Help centre / Requests & Emergencies
Raising a job request
Step by step: property, category, details, photos, access instructions and what happens after you submit.
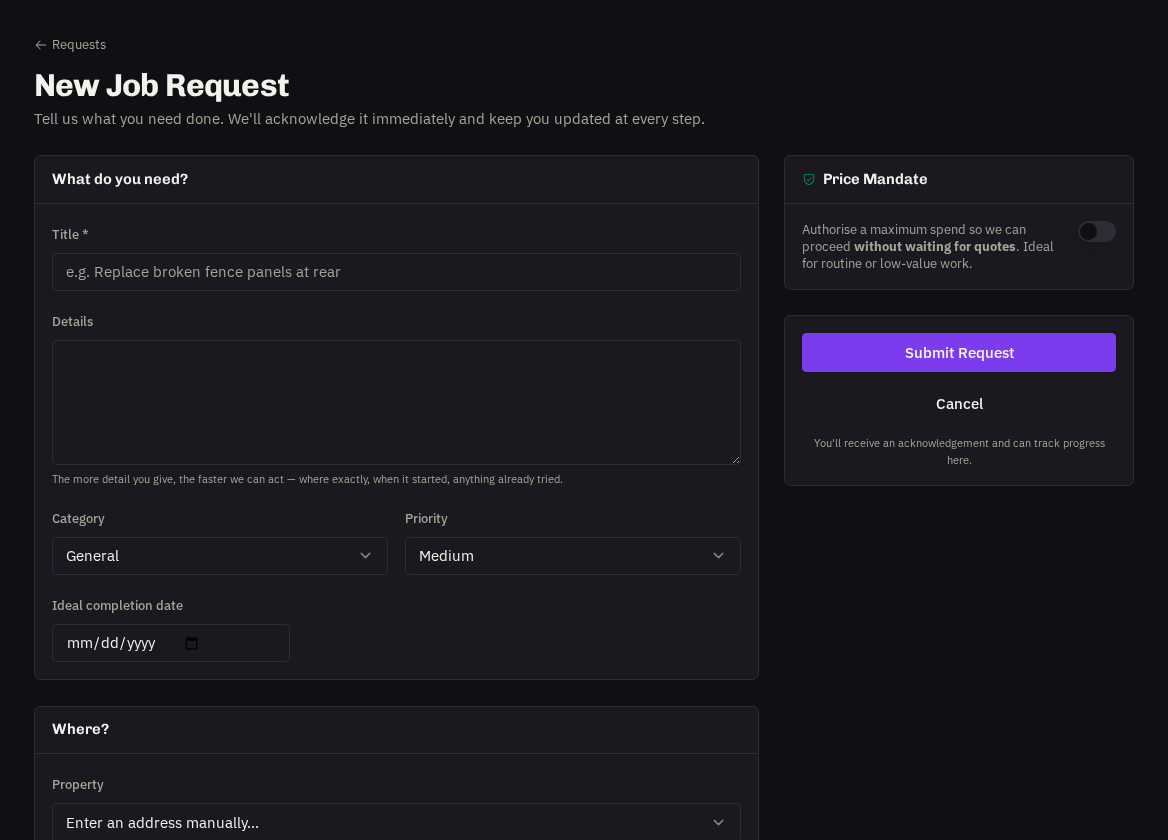
Use a job request for anything that isn't an emergency — repairs, faults, small works, inspections. Job Requests → New Request.
Steps
- Where? Pick one of your registered properties (address, access notes and on-site contact are filled in) or type the address.
- Category and priority. Choose the closest category and a priority. Priority helps scheduling — it does not replace an emergency; if it's urgent use Report Emergency.
| Priority | Use it for |
|---|---|
| Low | Cosmetic or can wait for the next planned visit |
| Medium | Needs fixing in the normal course of business |
| High | Affecting use of the property — we prioritise scheduling |
| Emergency | Not a priority level — use Report Emergency so the response clock starts |
- Details. What's wrong, where exactly, when it started, anything already tried. Specific detail means the right trade turns up with the right parts first time.
- Ideal completion date — optional.
- Access instructions — key-safe code, parking, who to ask for (pre-filled from the property).
- On-site contact — the person the engineer should call on the day.
- Photos — as many as you like. A clear photo of the fault is the single biggest time-saver.
- Price mandate (optional) — authorise spend up to a limit so we can skip quoting.
- Submit.
What happens next
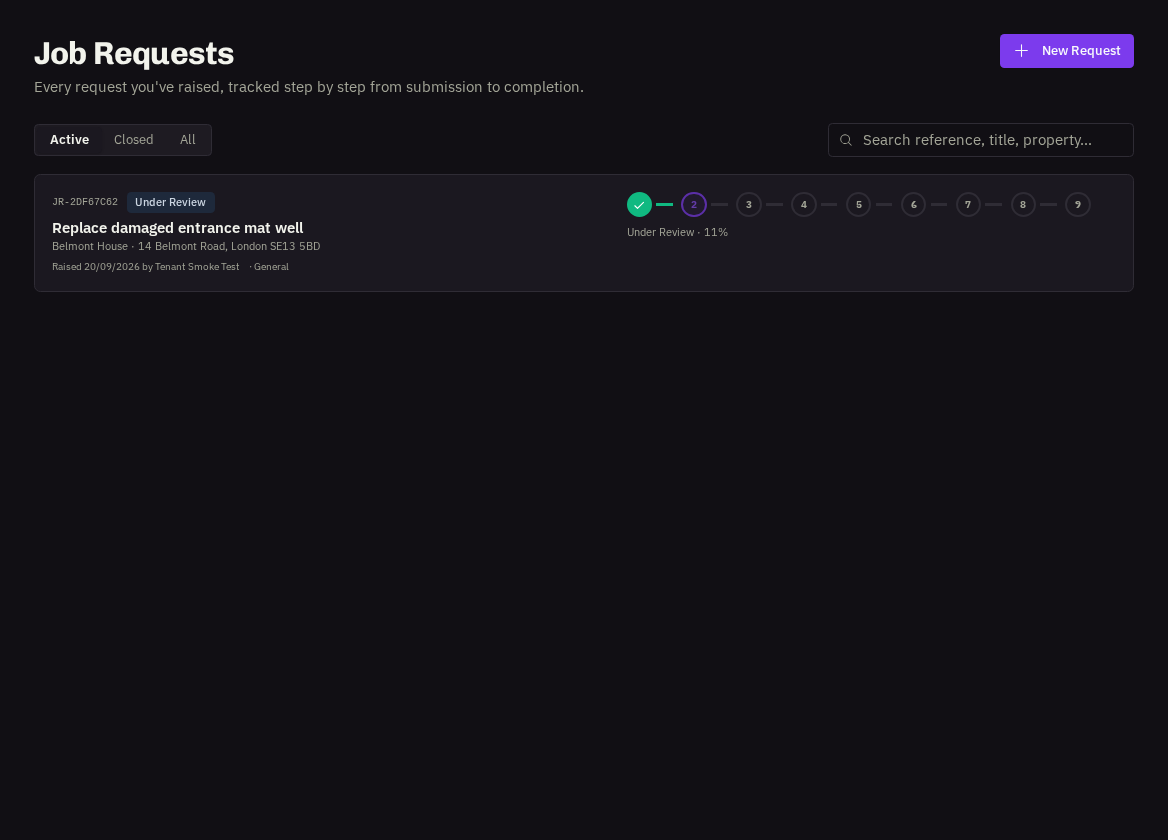
- An acknowledgement email with the reference number arrives straight away.
- The request appears under Job Requests with its progress tracker: Received → Under review → Quoting → Awaiting your approval → Approved → Scheduled → Complete.
- You get updates in-app (and by email or push if enabled) at each stage, and can comment on the request at any time.
Who can raise requests
Users and Administrators. Viewers can follow but not raise.
Related: Following a request · Price mandates · Registering properties & access notes